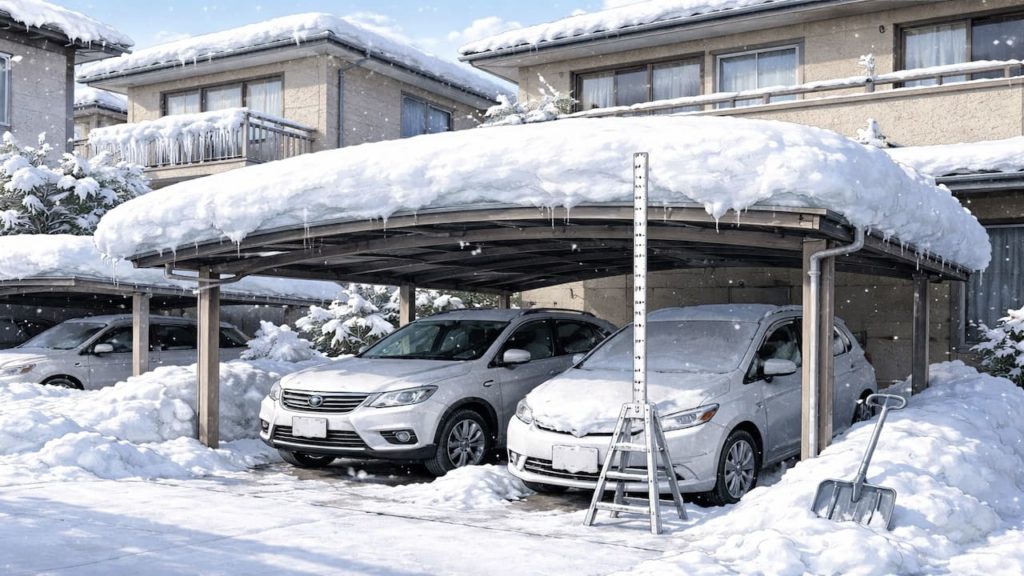
You notice scratches on the carport roof and your mind jumps to cracks and leaks. Even if it still looks “okay,” the marks make you feel like damage is spreading.
Some scratches are only cosmetic, but some are the first sign of panel stress or edge damage. In Japan, rainy seasons and humid air keep surfaces wet, so small defects can trap grime and show problems faster.
In this guide, you’ll learn how to check carport roof scratches before you repair. You will confirm whether the panel is still sound, where leaks could start, and what to watch after the next storm.
Hi, I’m Ken — I’m Japanese, and I live in Malaysia long-term, so I explain everyday life in Japan from a practical ‘from abroad’ perspective.
I hold a building design qualification and I’ve been on site for 20+ years across hundreds of jobs. I turn Japan’s unspoken rules into simple checks, so you can avoid costly mistakes and take the next step with clear actions that feel safe.
1. Carport roof scratches: 5 checks before repairing
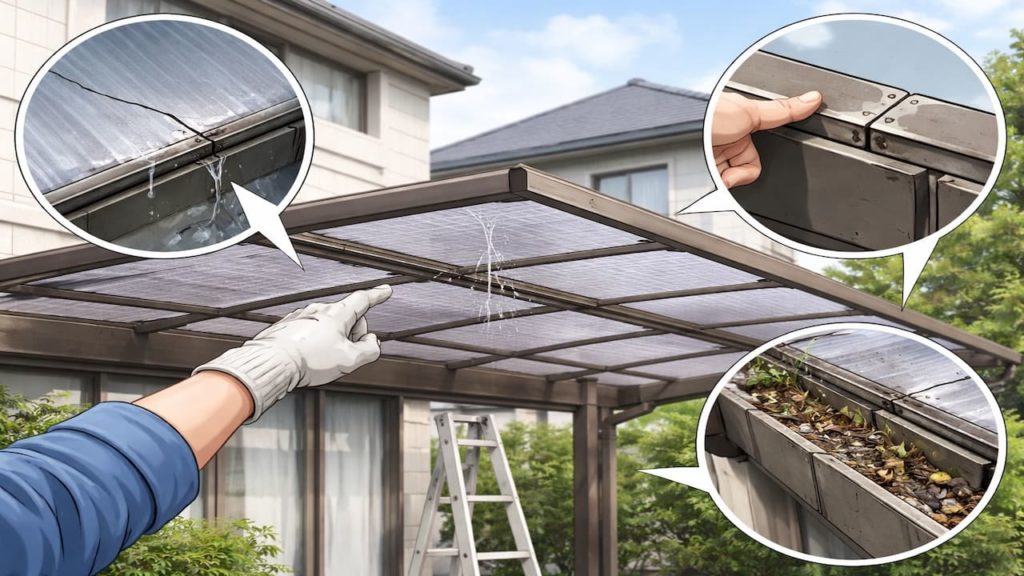
Check if the scratch is only on the surface or into the material.
Start by cleaning the area so you are not judging dirt as damage—wet grime can make a shallow line look deep. Use a soft cloth and plain water, then look again in angled light. In Japan, the roof stays damp longer after rain, so dirt clings and hides the true edge of a scratch. You want a clear view before you touch tools.
- Wash the line gently and remove stuck grit
- View from three angles in daylight for depth
- Run a fingernail lightly to feel a catch
- Check if the scratch turns cloudy or white
- Photograph the spot now for later comparison
Some people rush to “fix it” with abrasive pads, but that can widen the damage zone. If the scratch does not catch a nail and the panel looks uniform, it may be cosmetic. If it catches, clouds, or looks jagged, you slow down and inspect more. Repair starts with classification.
2. Cracks leaks and edges
Scratches near edges and fasteners are higher risk.
Edges and screw areas carry stress, so a scratch there can turn into a crack when wind vibrates the panel. Also, water often enters at seams and edges, not through the middle field. Look for hairline splits branching from the scratch, and check if there is any gap line that could guide water—this is where “tiny damage” becomes “night drip.”
- Inspect panel edge for small chips or splits
- Check around screws for star cracks patterns
- Look for seam gaps where water could track
- Search for drip stains under the same line
- Press gently near edge and feel flex change
You might think a leak would be obvious, but early leaks show as faint stains or a damp line under the joint. If the scratch sits beside a seam, it may be telling you the seam is moving. If the edge has a chip, it can grow with temperature swings. Treat edges like the danger zone and inspect them like you mean it.
3. Why roof scratches turn into bigger problems
Scratches become problems when they collect stress and dirt.
A scratch can become a stress riser, especially if it is deep or has a sharp end. Dirt packs into the line, stays wet, and makes the area dry slower, which changes how the surface ages. In Japan, humid nights and long rainy cycles keep micro wetness alive, so grime sticks and the “line” stays active. Wind vibration then adds small repeated movement at the same point.
- Sharp scratch ends concentrate stress under vibration
- Grime holds moisture and slows drying around line
- Thermal movement expands and contracts the panel daily
- Fastener areas flex and transfer load to edges
- Seams shift and rub when hardware loosens
Some scratches stay harmless forever, but the ones that keep changing are the ones that bite later. If the line gets longer, whiter, or develops a branch crack, it is not “just a mark.” If the same area starts dripping after storms, it is telling you where water tracks. That is why you track changes, not just appearance.
4. How to decide repair timing and avoid making it worse
Repair only after you confirm there is no active crack or leak.
First do your checks, then wait for one real rain to see if the area behaves. If you do any sanding, scraping, or drilling near a roof panel, protect your eyes because debris can fly. According to osha.gov. cost is mostly time/effort, because the biggest win is correct diagnosis and clean observation before you buy anything.
- Mark the scratch ends with tiny tape dots
- Check underside after rain for new damp lines
- Confirm screws are snug without crushing washers
- Remove trapped debris at edges and seams
- Recheck in one week and compare photos
You might want to patch immediately, but bad timing can lock moisture in or push damage wider. If there is movement, you address hardware and seam seating before cosmetic work. If the panel is cracked, the fix is not “polish,” it is structural replacement planning. Calm checks now prevent panic repairs later.
5. FAQs
Q1. Do scratches always mean the roof will leak?
No, many scratches are cosmetic, especially if they do not catch your nail and there is no underside stain. Leaks usually start at seams, edges, and fastener zones. Check those areas first.
Q2. What is the biggest warning sign near a scratch?
A hairline crack branching from the scratch, or a white cloudy line that keeps growing. If you see star cracking around screws, treat it as panel stress. That needs a different plan than cosmetic touch-up.
Q3. Should I seal a scratch with caulk?
Only if you already confirmed the water path and the material is compatible, otherwise you can trap dirt and moisture. Focus on cleaning edges and fixing loose hardware first. Sealing the wrong spot just makes the next problem harder to see.
Q4. How can I tell if the scratch is getting worse?
Mark the ends and compare photos after rain and after one week. If the line lengthens, turns whiter, or develops a branch, it is active. Changing damage is the real damage—stable marks are less urgent.
Q5. When should I stop DIY and call the installer?
If you see cracks near fasteners, repeated leaks, or a panel that flexes differently around the scratch, escalate. If hardware keeps loosening, the panel is being stressed. Get it checked before a storm makes it loud.
Pro's Tough Talk
I’ve spent 20+ years working around Japanese homes, so I’ve seen what tends to work—and what tends to go wrong—in everyday use. Scratches are not a crime, but ignoring the wrong scratch is how people end up with a drip problem that never dies. In tsuyu season, water doesn’t need permission.
Three cold truths. One, scratches near edges and screws are not the same as scratches in the middle. Two, dirt is a wet sponge that keeps the line active, like rubbing sandpaper on the same spot every storm. Three, vibration turns tiny flaws into fatigue, like bending a paper clip until it snaps.
Clean the line now. Mark the ends today. Check the underside after the next rain this weekend.
If you see branching cracks or new damp lines stop and escalate. That’s your line in the sand. Cosmetic fixes are for stable panels, not for panels that are already telling you they’re stressed.
Yeah, sure.
You notice the scratch at night with a flashlight, then you decide to “deal with it later.” Next storm hits, you hear a drip, and suddenly you’re standing in slippers under the carport like a detective on duty.
Summary
Carport roof scratches are only urgent when they sit near edges, fasteners, or seams, or when they change over time. Clean the area and classify the depth before you repair.
If you see branching cracks, underside stains, or repeated damp lines after rain, treat it as an early leak or stress signal. Fix movement and water paths before any cosmetic work.
Tonight clean one scratch and mark both ends so your next rain check gives you a clear answer. Then keep reading related carport leak and hardware guides to stop small issues early.