You want a pergola over your deck, but you’re not sure if bolting it down is safe. A pergola looks light, yet wind and wobble can turn it into a real load.
The risk is not the beams you see, it is where the forces go: into deck boards, joists, posts, and footings, plus water traps at the connections. In Japan, typhoon season rain and gusts can punish weak attachments fast.
In this guide, you’ll learn 5 checks before attaching a pergola to a deck so you know if the deck can carry the load or needs separate posts. You’ll also learn what “load path” looks like in plain words.
Hi, I’m Ken — I’m Japanese, and I live in Malaysia long-term, so I explain everyday life in Japan from a practical ‘from abroad’ perspective.
I hold a building design qualification and I’ve been on site for 20+ years across hundreds of jobs. I turn Japan’s unspoken rules into simple checks, so you can avoid costly mistakes and take the next step with clear actions that feel safe.
1. Deck pergola attachment: 5 checks before bolting to your deck
Attach pergolas only if the deck can carry wind and racking loads
Start by assuming the pergola load is more about sideways force than vertical weight, because wind tries to rack and pull it. If you bolt into deck boards or rim boards only, you are basically hanging it off trim. In Japan, gusty storms can test this hard, so your deck needs a clear load path into posts and footings. cost is mostly time/effort for inspection first.
- Identify where pergola posts would transfer loads down
- Check deck posts and footings are solid and plumb
- Inspect joists and beams for cracks and rot
- Confirm ledger connection is sound at house wall
- Shake railing and frame to feel lateral stiffness
You might think “it’s just shade,” so any bolts will do. Pergolas catch wind, and the deck must resist that sideways shove without relying on the railing. Treat it as a structure, not a decoration.
2. Load posts
The pergola must land on posts not on deck boards
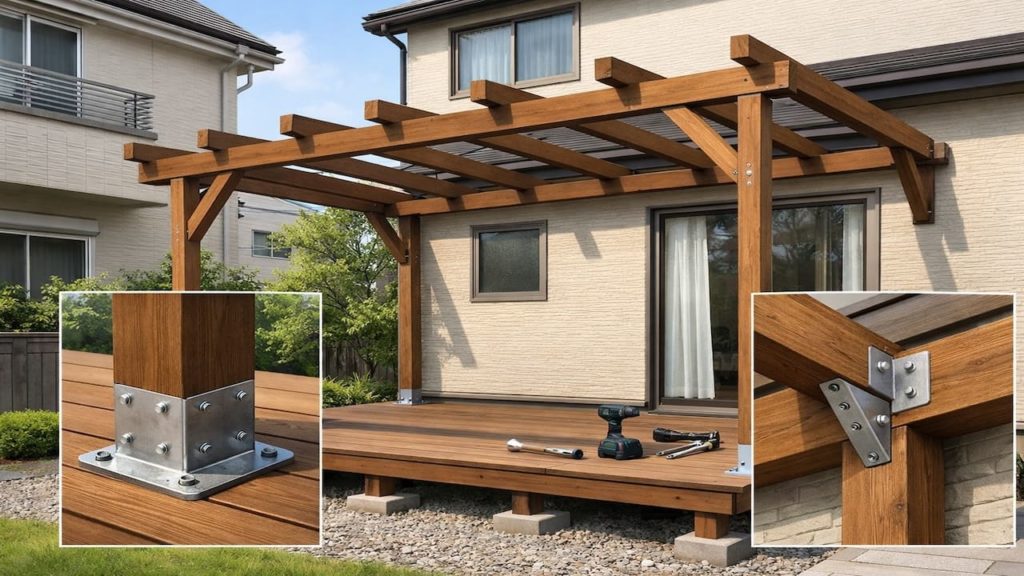
The safest setups put pergola posts over structural support lines: beams, posts, or new footings, so loads go straight down. If the only place you can bolt is between joists or into the rim, you are creating a bending and pull-out problem. In Japan, wet seasons can soften wood around fasteners, so poorly supported posts can loosen over time. If you need proper brackets, anchors, and bolts, plan roughly ¥3,000–20,000 depending on hardware count and whether you add posts.
- Place pergola posts directly above deck posts below
- Add blocking under post bases for full bearing
- Use rated post bases not random angle brackets
- Avoid relying on rim board alone for support
- Plan separate footings if alignment is impossible
You might want to “spread it” with a big plate on the deck surface. That still leaves the load going into boards and fasteners, and boards are not designed as columns. The post needs a real path to something strong.
3. Why deck-mounted pergolas fail
Failures happen when loads bypass the structural frame
When pergola posts are attached to deck boards, movement starts immediately: boards flex, screws loosen, and joints open for water. Sideways forces then pry the connection, and once it wiggles, it gets worse every storm. In Japan, humid air and rain can accelerate rot at connection points, and rot plus movement is a bad combo. The failure is usually slow, then sudden.
- Bolts into boards crush fibers and loosen
- Rim attachments pry out under wind racking
- Wobble opens gaps that trap water at joints
- Rot starts around hardware where drying is slow
- Deck frame was not designed for tall lateral loads
You might think adding more bolts fixes the wobble. More bolts into weak members just spreads damage and hides the real issue. Fix the load path, not the bolt count.
4. How to attach a pergola safely to a deck
Build a straight load path with posts blocking and bracing
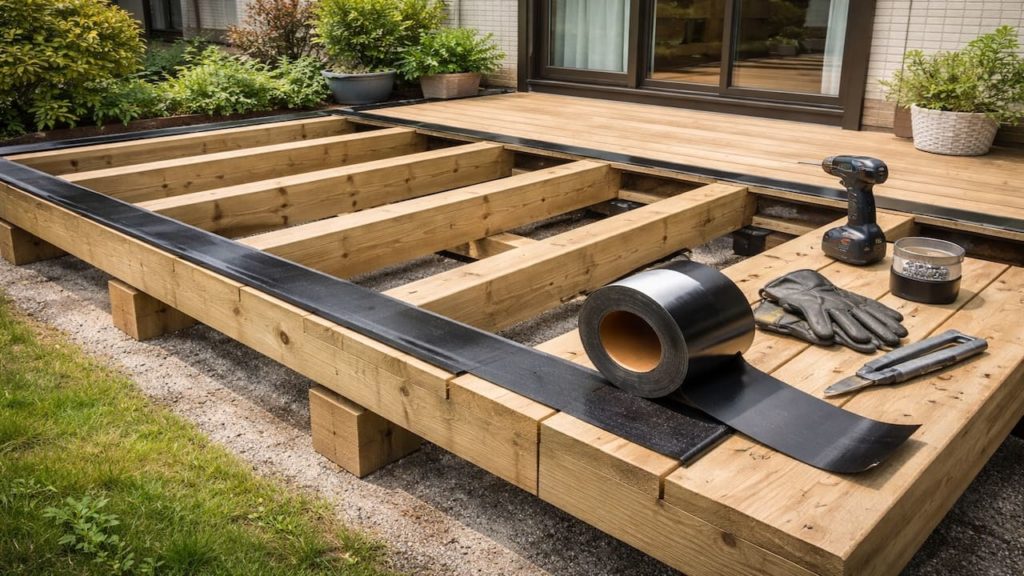
Start by planning post locations that align with deck posts or by adding new posts that run down to proper footings. Add solid blocking at post bases and use rated connectors so the joint cannot rack or lift. In Japan, plan for wind and rain, so keep water from sitting at the base of posts and recoat cut ends to avoid early decay. cost is mostly time/effort if the deck already has strong posts, but hardware and added posts change that.
- Align pergola posts above structural deck support lines
- Add blocking between joists under each post base
- Use through bolts and washers not short screws
- Add diagonal bracing to resist side racking
- Seal cuts and keep bases from holding water
You might want to skip bracing because it “ruins the look.” Without bracing, you get sway, then squeaks, then loose joints, then water entry. If you hate braces, you still need stiffness, so plan hidden bracing or stronger connections. Do not pretend wind is optional.
5. FAQs
Q1. Can I bolt pergola posts directly through deck boards?
Not if you want it to last, because boards are not structural columns. Posts must bear on framing and transfer load down to posts or footings.
Q2. Do I need separate footings for a pergola?
Often yes, especially if your deck was not built for tall lateral loads. If you cannot align pergola posts with deck support, separate footings are the safer path.
Q3. Is a pergola “light enough” to ignore wind loads?
No, wind is the big force, not weight, and it works sideways. The taller the pergola, the bigger the leverage, so attachments must resist racking.
Q4. What is the biggest warning sign my deck is not stiff enough?
If the deck or railing sways when you push it, it is already telling you it hates lateral load. Fix stiffness before you add a tall structure.
Q5. How do I protect connection points from rot?
Keep water from sitting on horizontal surfaces, seal cut ends, and use hardware that stays tight and corrosion resistant. In humid seasons, drying speed matters more than people think.
Pro's Tough Talk
I’ve spent 20+ years working around Japanese homes, so I’ve seen what tends to work—and what tends to go wrong—in everyday use. People bolt pergolas to decks like they are attaching a coat rack, then the first big wind teaches a lesson. A pergola is basically a sail with legs.
Here’s the cold breakdown: loads must travel down into posts and footings, and sideways forces must be resisted by bracing and stiff connections. You are not dumb, and the pergola kit is not always trash, but the deck was not designed for tall leverage unless it was built for it. In Japan’s stormy season, wobble becomes rot, and rot becomes failure. Simple chain.
Check your deck stiffness now. Find post lines and plan load paths today. Add posts and bracing this weekend.
Give the pergola a real load path or do not attach it and you avoid future panic and repairs. If you cannot align posts or the deck already moves, the next step is separate posts to footings instead of deck attachment.
This is like taping a broomstick to a table and calling it a mast. Bruh. You know that moment the pergola starts squeaking in wind and you pretend you did not hear it. Or when you see the post base moving a tiny bit and your brain goes quiet like it just saw a horror movie.
Summary
Before bolting a pergola to a deck, confirm the deck can handle sideways wind loads and has a clear load path into posts and footings. Avoid attaching posts to deck boards or relying on the rim board alone.
Place pergola posts over structural support lines, add blocking and rated connectors, and include bracing to resist racking. If the deck sways or alignment is impossible, use separate posts with proper footings.
Map the load path today so you build it once and trust it through storms. Once it is stiff and dry at connections, the pergola becomes comfort instead of worry.