You finish laying patio pavers, step back, and it looks awesome. Then the first rain comes and the surface feels off, puddles show up, or the edge starts drifting.
Most DIY failures happen before the first paver goes down. In Japan, wet seasons and tight drainage around homes punish small base mistakes fast.
In this guide, you’ll learn the base warnings that ruin pavers later and how to catch them early with level checks and slope control. You’ll also learn what to redo now so you don’t re-lay everything later.
Hi, I’m Ken — I’m Japanese, and I live in Malaysia long-term, so I explain everyday life in Japan from a practical ‘from abroad’ perspective.
I hold a building design qualification and I’ve been on site for 20+ years across hundreds of jobs. I turn Japan’s unspoken rules into simple checks, so you can avoid costly mistakes and take the next step with clear actions that feel safe.
1. Patio DIY base mistakes: 5 warnings before you lay pavers
If the base is wrong the pavers will complain forever no matter how neat your pattern is.
DIY patios fail from invisible issues: soft subgrade, uneven compaction, and sloppy slope. Japan’s rainy weeks make those issues show up faster because water finds every low spot and keeps the base wet. Your job is to make a firm plane that drains on purpose. Not “close enough.”
- Check subgrade firmness before adding any base
- Compact base in layers not one thick dump
- Set slope away from walls before screeding sand
- Use string lines to keep height consistent
- Lock edges so pavers cannot creep outward
You might think the pavers will “settle into place.” They do settle, but not in a nice way. They settle into dips and wobble because the base let them. Fix the base now and the patio stays calm.
2. Level checks and slope
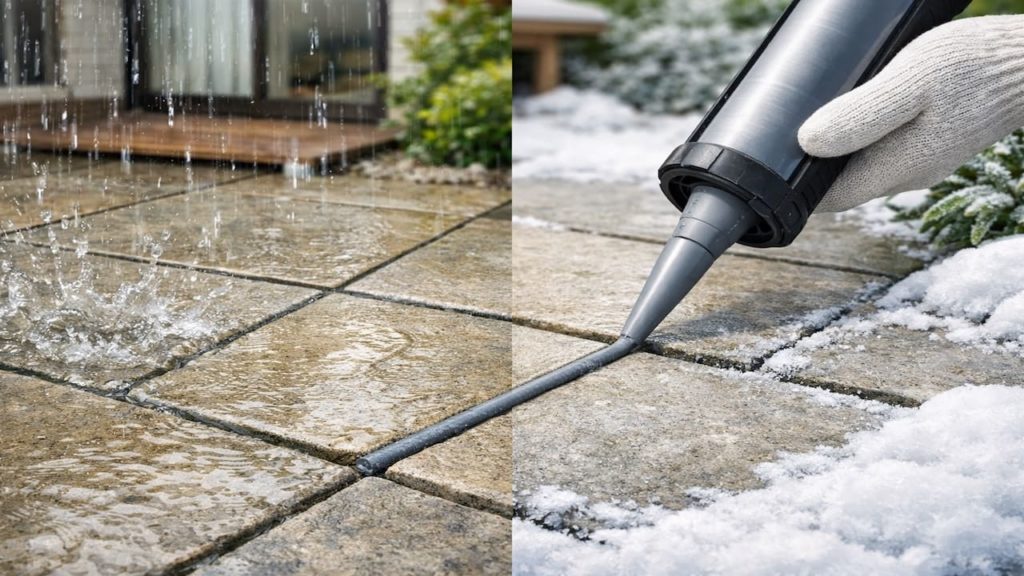
Flat is not the goal slope is because water needs a direction.
A patio that looks flat can still hold water if the slope is inconsistent. Small Japanese patios near sliding doors often need careful fall so water doesn’t run back toward the house. Check slope with a long straight board and a level, then re-check after compaction because compaction changes height. Measure twice, dig once—yeah, that line is real.
- Use a long straight board for reliable readings
- Set a consistent fall away from the house edge
- Check slope in two directions not one line
- Recheck levels after compacting each base layer
- Keep finished height below door sill safety gap
You might aim for perfectly level because it looks neat. That’s how puddles happen. A gentle predictable slope looks the same to the eye but behaves totally different in rain. Choose behavior.
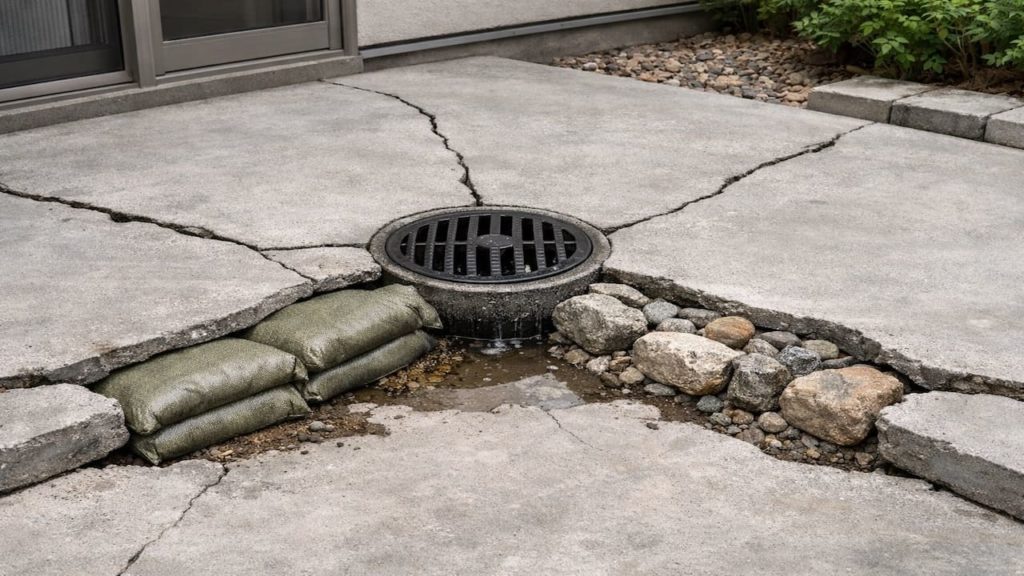
3. Why base mistakes show up months later
Base mistakes hide until water and use expose them then they grow fast.
Right after installation, everything feels tight because nothing has cycled through rain, heat, and foot traffic. Then water moves fines, the base relaxes, and the pavers settle unevenly. In Japan, long humid stretches keep the base damp, so it never fully firms up if it was poorly compacted. Slow failure, then sudden annoyance.
- Water pumps fines out through tiny voids
- Uneven compaction creates soft spots under load
- Flat zones collect water and keep base saturated
- Weak edges allow the whole field to spread
- Thick bedding sand settles and makes dips
You might think the pavers “moved on their own.” They moved because the base allowed it. The surface is a mirror of the layer under it. Respect that and you stop blaming materials.
4. How to avoid the common DIY traps before laying
Build a firm draining base then screed thin and the pavers will behave.
Cost is mostly time/effort. Mark finished height and slope with strings, then excavate to fit base, bedding, and paver thickness. Compact the subgrade if it feels loose, add base in thin lifts and compact each one, then screed a thin bedding layer right before placing pavers. In Japanese patios, this also helps keep water from creeping toward door tracks and wall lines.
- String line the finish plane before excavation starts
- Excavate enough depth for real base thickness
- Compact subgrade then compact base in thin lifts
- Screed bedding thin and never use it to level
- Install edge restraint before final compaction pass
You might want to rush because the pavers are sitting there. Rushing is how you end up pulling them up later. If a section feels soft now, it will feel worse after rain. Fix it while it’s open.
5. FAQs
Q1. How much slope should a patio have?
A gentle consistent fall is enough as long as water moves away from the house and does not pond. The key is consistency across the whole surface, not a steep tilt.
Q2. Can I use bedding sand to fix low spots?
No, that creates soft zones that settle unevenly. Fix low spots in the compacted base layer, then keep bedding thin and uniform.
Q3. Why do pavers wobble even with a thick base?
Usually the base was not compacted evenly, or the bedding layer is uneven. Also check if the pavers are rocking on high points or debris.
Q4. Do I need edge restraints for a small patio?
Yes, edges keep the field from spreading and joints from opening up. Even small patios creep outward over time without restraint.
Q5. What is the quickest way to test my base before laying?
Walk it hard, twist your heel, and check for soft spots or pumping. Then check slope with a straight board in multiple directions before screeding.
Pro's Tough Talk
I’ve spent 20+ years working around Japanese homes, so I’ve seen what tends to work—and what tends to go wrong—in everyday use. Most DIY patios fail before the first paver hits the ground.
Here’s the ugly truth: people chase “level” and forget “drain,” they dump base thick and skip layer compaction, and they try to fix everything with fluffy sand. That’s like building a table on a stack of towels. Then Japan’s wet season shows up and the patio starts doing a slow dance.
Do this now: set strings for finish height and slope. Do this today: compact the subgrade and base in thin layers. Do this on the weekend: screed bedding thin and lay pavers without dragging grit.
If water ponds after your first hose test stop and correct slope before you continue. If a spot feels soft under your boot, excavate and rebuild it, because it will only get worse.
You know that moment you say “Close enough” and keep going? Congrats. That’s the exact moment you scheduled your future re-lay party.
Summary
DIY base mistakes show up later as wobble, puddles, and drifting edges. Check subgrade firmness, compaction in layers, and edge restraint before you lay anything.
Slope matters more than perfect level, especially near walls and doors. If your hose test shows ponding or your base feels soft, fix it while it is still open.
String line the slope and stomp test the base today so you catch the failures early. Then move to the next patio step with confidence instead of luck.