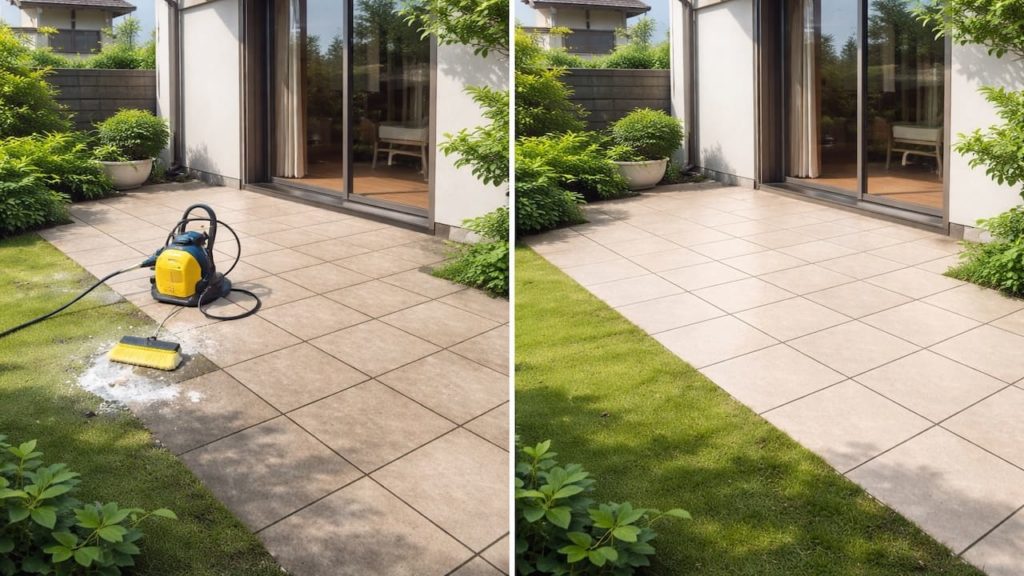
You notice patio water running toward the house wall instead of away. After a storm, the base of the wall stays wet and the joint line looks darker.
This can be a slope issue, a low spot, or a drain path that got blocked over time. In Japan, rainy weeks can dump water fast, so a small pitch mistake shows up hard.
In this guide, you’ll learn 5 checks to confirm the slope direction and redirect runoff without tearing everything out. You’ll also learn when a simple drain add-on beats trying to “seal” the problem.
Hi, I’m Ken — I’m Japanese, and I live in Malaysia long-term, so I explain everyday life in Japan from a practical ‘from abroad’ perspective.
I hold a building design qualification and I’ve been on site for 20+ years across hundreds of jobs. I turn Japan’s unspoken rules into simple checks, so you can avoid costly mistakes and take the next step with clear actions that feel safe.
1. Patio water runs to house: 5 checks to fix the slope direction
If water runs to the house the pitch is wrong somewhere.
Don’t guess by looking, because tile patterns can trick your eye—use simple checks that show the real flow. One low spot can pull water back toward the wall even if most of the patio is sloped correctly. Splash from roof edges can also mimic “bad slope” by dumping water right at the wall line. In Japan’s rainy season, that wall-side wet line is a warning sign, not a cosmetic issue.
- Do a hose test and watch the flow
- Use a level to confirm pitch away
- Mark puddles with chalk after heavy rain
- Check wall base for damp line and grime
- Trace downspout splash landing near the patio
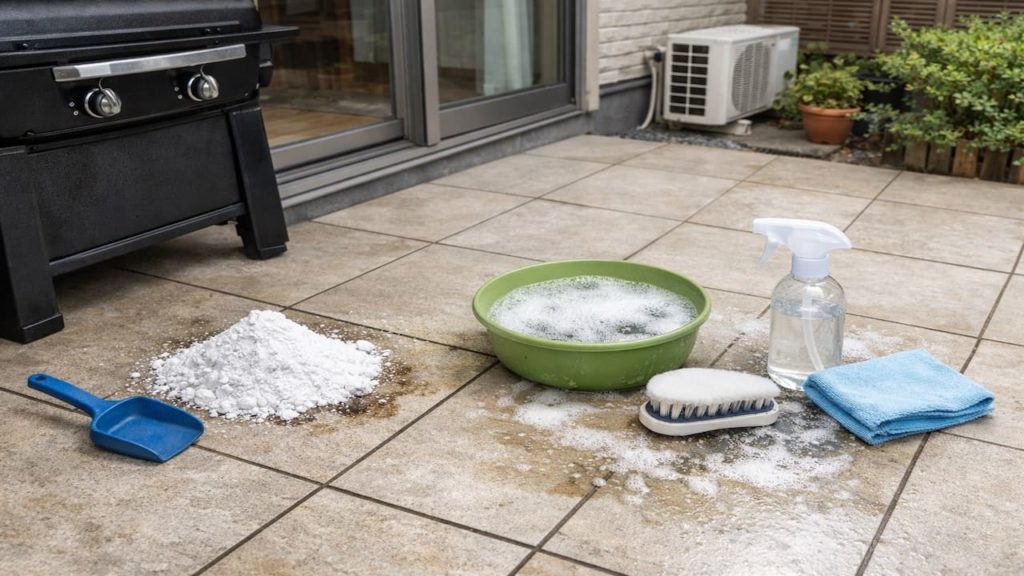
Some people try to fix this with more sealer. That’s backwards. Sealer doesn’t change gravity or water paths. Fix the pitch or add drainage, then the wall stops getting soaked.
2. Pitch away and drains
Redirecting runoff is easier than fighting water at the wall.
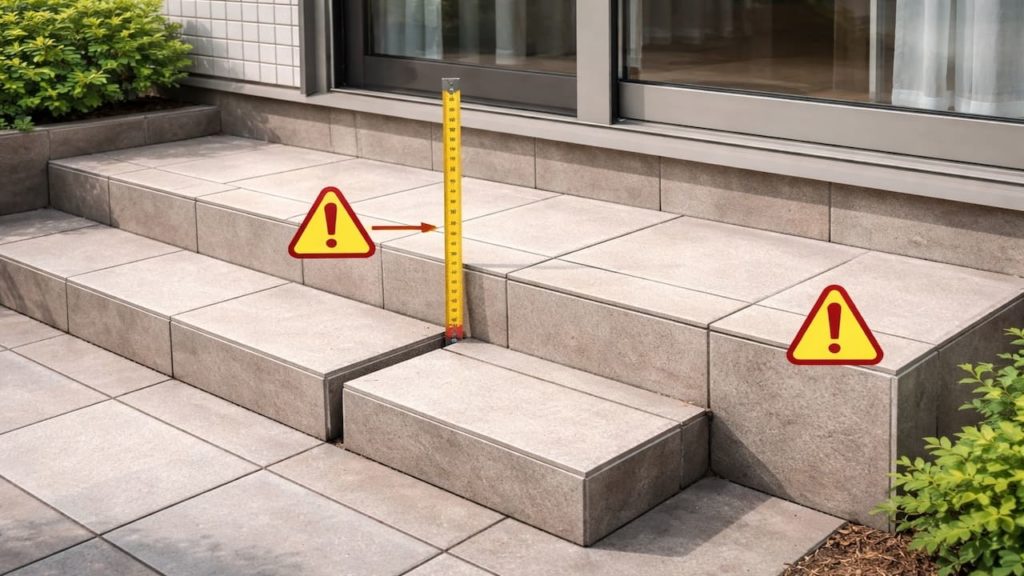
For lots around a home, a common baseline is sloping ground away so it drops at least 6 inches within the first 10 feet. According to codes.iccsafe.org.
On patios, you can either re-pitch the surface or intercept water with a drain line so it never reaches the wall. If you add a channel drain or a small catch basin, basic parts often land around ¥3000–20000 depending on length and fittings. In Japan, wet winters and long humid stretches make slow-drying wall zones a mold magnet, so moving water away is worth it.
- Add a channel drain along the wall edge
- Cut a relief joint to guide water outward
- Extend downspouts to discharge away from patio
- Build a shallow swale to carry runoff
- Regrade border soil so water leaves faster
Some folks install a drain but keep the same low spot feeding it from behind. That’s how you still get wall wetting. Your drain must sit at the low line and connect to a real outlet. Otherwise it becomes a fancy puddle holder.
3. Why patio water flows toward the house
Water follows the lowest line even if it is subtle.
Patios often settle slightly, especially at edges where base support is weaker, and that can flip the pitch near the house. Tile or pavers can also “dish” in the middle from base erosion, creating a backflow lane to the wall. Clogged joints and algae film slow down surface flow, so water lingers and finds a sideways path. In Japan, narrow side yards can funnel rain like a chute and concentrate flow right at the foundation zone.
- Base settles and creates a back slope near wall
- Low spot pulls water despite correct overall pitch
- Edge erosion drops perimeter and redirects runoff
- Roof splash dumps water at the wall line
- Clogged joints slow drainage and spread puddles
It’s easy to blame the tile and ignore the base. That wastes time. The cause is almost always pitch, settlement, or discharge location. Fix the low line and the flow changes immediately.
4. How to fix slope direction without rebuilding everything
Start with the smallest fix that changes the water path.
First prove the flow with a hose test, then decide if you need spot leveling, edge rebuilding, or a drain intercept. If the wall-side zone is only a narrow strip, a channel drain or regrading the border can be enough. If the whole patio pitches wrong, you’re looking at re-pitching or resetting pavers, because water will keep running to the house no matter how you seal it. In Japan, plan around surprise showers by staging the work so exposed base is covered and dries fast.
- Grind or lift a high ridge that blocks flow
- Fill a low spot using a compatible patch mix
- Reset a few pavers to reestablish pitch
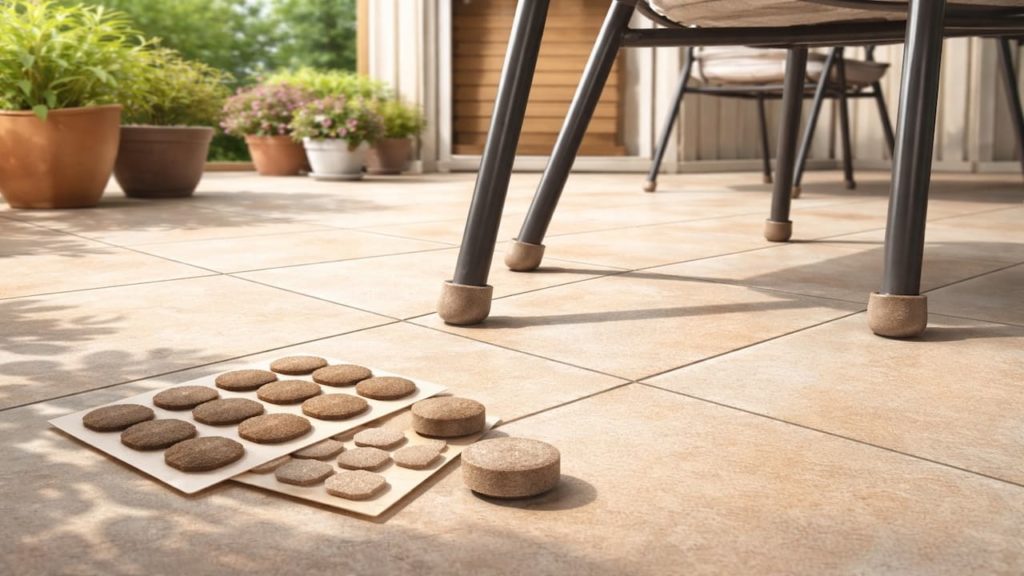
- Install splash blocks to reduce wall soaking
- Keep the wall edge clean to spot changes
Some people try to “build up” the wall edge with caulk. That is a bandage. Water will find a new entry point and you’ll still get damp at the base. Change the slope or catch the water, then seal only as a finishing move.
5. FAQs
Q1. How can I test slope fast without special tools?
Use a hose test and a simple level to see where water actually travels. Mark the low line with chalk after it dries so you can target the fix.
Q2. Is it normal for a little water to touch the wall?
A tiny splash is common, but a wet line that stays dark is a problem. If it stays wet for hours, you need better pitch or interception.
Q3. Can sealing the patio stop water from reaching the house?
Sealer can reduce absorption, but it does not change surface flow direction. If the pitch sends water to the wall, sealing just makes it reach the wall faster.
Q4. What if I cannot regrade because space is tight?
Then intercept water with a drain or a shallow swale—tight layouts are common around Japanese homes. The goal is a controlled outlet, not a perfect slope everywhere.
Q5. When is a drain better than re-pitching the whole patio?
If only the wall-side strip is the low line and the rest drains fine. If the entire surface pitches wrong, a drain can help but it won’t fix every puddle.
Pro's Tough Talk
I’ve spent 20+ years working around Japanese homes, so I’ve seen what tends to work—and what tends to go wrong—in everyday use. When patio water runs to the house, it’s not “a little wet,” it’s a slow-motion leak audition.
Three reasons this happens: the pitch flipped near the wall, a low spot formed, or the roof dumps water right where it hurts. Water is a lazy bully, it takes the easiest route and keeps taking it. Trying to seal your way out is like wearing a raincoat while standing under a waterfall.
Right now, hose test and find the low line. Today, move discharge points away and clear the path to an outlet. This weekend, reset the low strip or add a channel drain so the wall stops getting fed.
Do that and the problem calms down fast. If the wall-side zone stays wet long after rain you need slope or drainage, not more “waterproof” talk. If it only happens during big storms, your discharge and low spots are the real suspects.
Nope.
You can keep watching water run to your house like it pays rent, or you can flip the pitch and kick it out.
Summary
When patio water runs to the house, the slope is wrong somewhere or a low spot is pulling flow back. Confirm it with a hose test, a level, and puddle marks after rain.
Fix it by changing the water path with spot leveling, edge resets, downspout control, or a drain intercept at the low line. If the whole patio pitches wrong, re-pitching is the clean solution.
Run one hose test today and mark the low line so your next move is targeted and not guesswork. Then keep going with the patio drainage and joint stability topics that match your layout.