Your pergola is supposed to make rain nicer, not drip on your head like a prank. But drip problems are common.
The cause could be edge runoff, a flat slope, or water finding seams and jumping off in the wrong place.
In this guide, you’ll learn how to track pergola rain drips and stop them. You will check edges, slope, and seams that act up in Japan’s heavy rain months.
Hi, I’m Ken — I’m Japanese, and I live in Malaysia long-term, so I explain everyday life in Japan from a practical ‘from abroad’ perspective.
I hold a building design qualification and I’ve been on site for 20+ years across hundreds of jobs. I turn Japan’s unspoken rules into simple checks, so you can avoid costly mistakes and take the next step with clear actions that feel safe.
1. Pergola rain drip problems: 5 checks
Follow the water path and you find the drip source fast.
Rain drips are not random. Water follows the easiest path, then surface tension makes it “stick,” then it drops where the surface ends or a seam interrupts the flow. In Japan, sudden downpours can overwhelm small edges and turn a minor flaw into a constant drip line. You need to watch the runoff during real rain, not only after.
- Stand back and map where the drip line forms
- Check which edge drips first in light rain
- Look for seams that split the water sheet
- Inspect the lowest corner where water collects
- Check if posts splash water back onto deck
Some people jump to “add a gutter” immediately. Sometimes the fix is just slope or seam sealing, and a gutter becomes optional. Do the checks before you buy parts.
2. Edge runoffs slope and seams
Most drips come from a flat slope and a sharp edge.
If the roof is nearly flat, water crawls along the underside and then drops late, often right where you walk. If seams have gaps or steps, they break the flow and create multiple drip points. In Japan’s rainy season, leaves and pollen also clog small channels and push water sideways. Cost is mostly time/effort.
- Use a level to confirm roof pitch is not flat
- Check underside for water tracks and dark stains
- Inspect seam overlap direction like roof shingles
- Look for sharp metal edges that cause drip delay
- Clear debris that diverts flow toward corners
Some will say “it’s normal for pergolas to drip.” Light mist, sure, but steady drips are a design or install issue. Improve slope and edge control and you can make rain behavior predictable.
3. Why pergola drip lines form in heavy rain
Drip lines form when water clings then drops at a new edge.
Surface tension makes water cling under panels and beams, especially on smooth plastics and painted metal. When that sheet hits a seam, it breaks and becomes separate streams that drop more aggressively. Wind also pushes water sideways, so the “lowest point” changes in gusts. Japan’s sudden storms make all of this show up at once.
- Smooth surfaces let water crawl under edges
- Seams split flow and create multiple drip points
- Wind pushes runoff sideways into corners
- Debris blocks channels and forces overflow elsewhere
- Cold rain makes condensation add extra dripping
People blame the panel material. Material matters, but geometry matters more. Give water a clear exit path and a drip edge, and most materials behave fine.
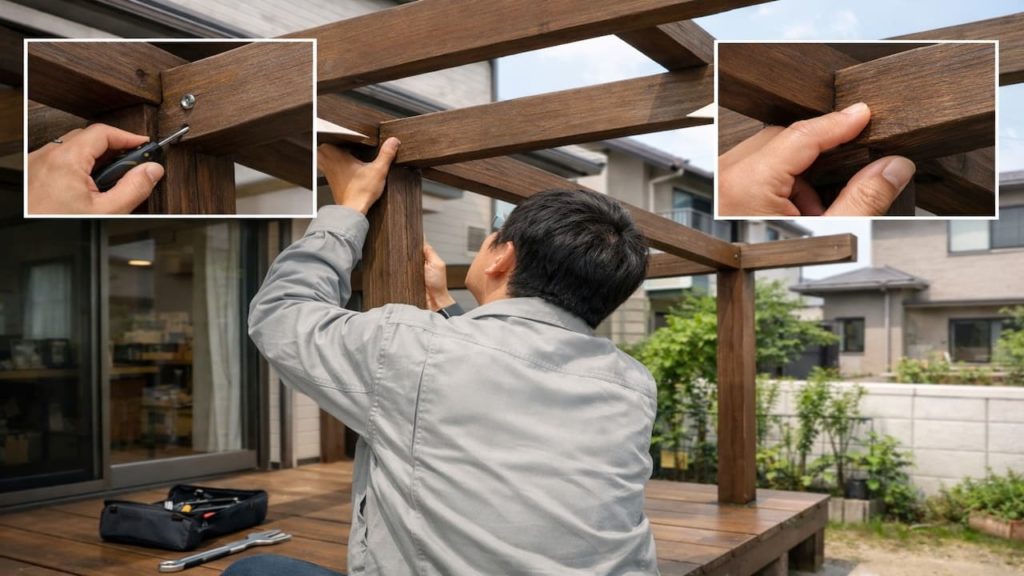
4. How to stop drips without rebuilding the roof
Create a clear exit edge and seal seams in the flow direction.
Start with cleaning and observation, then adjust slope if you can with shims or bracket tweaks. Add a simple drip edge or small gutter only where the drip line is confirmed, not everywhere. If you buy small items like sealant, seam tape, or a basic drip edge strip, plan around ¥500–3,000 for basic supplies.
- Clean roof and seams so you can see water tracks
- Shim brackets to add a small outward slope
- Seal seams with overlap so water flows down
- Add drip edge strip where underside clinging occurs
- Test with gentle hose flow from top edge
Some people try to seal every edge and trap water. That can create bigger overflow later. Keep the path open, guide the water out, and only seal where water is entering a joint or breaking the flow.
5. FAQs
Q1. Is dripping always a sign of a leak?
No, it can be normal runoff behavior, especially with smooth panels. A leak is when water enters joints or the wall, not just drops off edges.
Q2. Why does it drip more at one corner?
That corner is usually lower, or wind pushes flow that way. Check pitch and bracket height differences.
Q3. What is the quickest fix I can try first?
Clean debris and confirm the true drip line. Many drips worsen because leaves and pollen divert flow into corners.
Q4. Will a gutter solve everything?
It helps if the issue is uncontrolled edge runoff, but it can clog and overflow in Japan’s rainy season. Fix slope and seams first, then decide on a gutter.
Q5. When should I call a pro?
If water is entering the wall, staining the siding, or pooling at footings, stop experimenting. That can become rot, mold, and structural damage.
Pro's Tough Talk
I’ve spent 20+ years working around Japanese homes, so I’ve seen what tends to work—and what tends to go wrong—in everyday use. Rain drips are not magic. Water is doing exactly what you allow it to do.
Cold breakdown. Flat slope makes water wander, and smooth panels make it cling like a stubborn sticker. Seams act like speed bumps, splitting flow into messy streams. You stand there in the rain thinking “why here,” and it hits the exact spot where you step out with slippers. And yes, it always happens when you are carrying groceries.
Find the drip line. Add a little slope. Control the exit edge.
If water is entering joints you seal and re-lap the seam. If it is only edge runoff, you guide it with a drip edge or a small gutter where it matters. If the wall is getting wet, you stop patching and fix the detail properly.
Yeah, the rain is not rude. Your edge detail is.
Summary
Track the water path and confirm where the drip line forms. Most pergola drips come from edge runoff, flat slope, or seam interruptions.
Clean debris, add a small outward pitch, and seal seams in the flow direction. If needed, add a drip edge or a small gutter only where the drip is proven.
Map the drip line in the next rain and adjust slope first. Then keep reading pergola water-control guides so the space stays usable.